
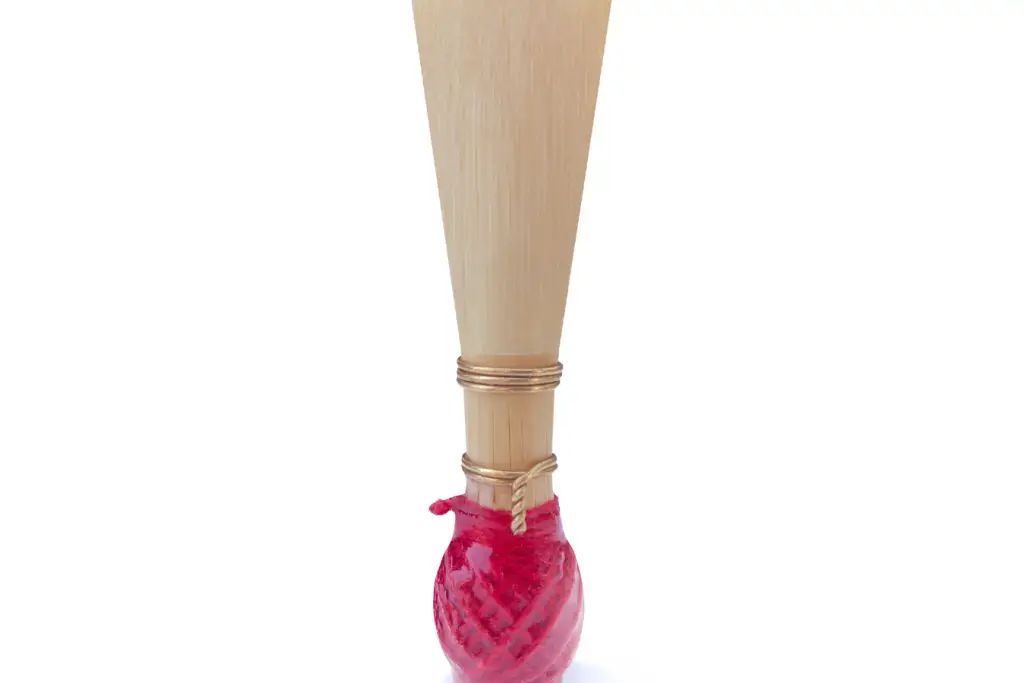
Reed knives are essential tools for woodwind musicians who make or adjust their own reeds. These specialized knives allow players to shape and refine cane reeds, crucial for producing optimal sound on instruments like oboes and clarinets. A reed knife typically features a thin, sharp blade designed to make precise cuts and scrapes on delicate reed material.
Musicians use reed knives to thin specific areas of the reed, adjust its flexibility, and fine-tune its response. Most reed makers utilize a variety of knives for different tasks, including light knives for finishing reed tips and heavier ones for removing bark. Proper technique involves supporting the reed on a stable surface and making controlled, gentle strokes with the knife.
Maintaining a sharp edge on a reed knife is crucial for achieving clean cuts without damaging the cane. Musicians often use specialized sharpening tools like knife wedges to maintain their reed knives’ edges. With practice and patience, woodwind players can master the art of using reed knives to create customized reeds tailored to their individual playing needs.
Understanding the Reed Knife
Reed knives are specialized tools essential for adjusting and shaping reeds for woodwind instruments. They come in various types, have distinct anatomical features, and differ in blade designs to suit specific reed-making needs.
Types of Reed Knives
Reed knives vary based on their intended use and the instrument they’re designed for. Oboe reed knives typically have a shorter, more curved blade compared to those used for bassoon or clarinet reeds. Some common types include:
- Single hollow ground knives
- Double hollow ground knives
- Beveled edge knives
- Combination knives
Each type serves a specific purpose in the reed-making process. Single hollow ground knives are versatile and suitable for beginners. Double hollow ground knives offer precision for detailed work. Beveled edge knives are ideal for heavy scraping and initial shaping.
Anatomy of a Reed Knife
A reed knife consists of several key components:
- Blade: The cutting edge, usually made of high-carbon steel
- Handle: Often wooden or plastic, designed for comfortable grip
- Ferrule: A metal band connecting the blade to the handle
- Tang: The portion of the blade that extends into the handle
The blade’s shape and grind significantly affect its performance. A well-designed reed knife should feel balanced in hand and allow for precise control during use.
Double Hollow Ground vs. Beveled Edge
Double hollow ground and beveled edge knives are two popular blade designs for reed making.
Double hollow ground knives feature concave grinds on both sides of the blade. This design creates a sharp, thin edge ideal for delicate scraping and fine adjustments. They excel at producing smooth, even surfaces on reeds.
Beveled edge knives have a single angled grind on one side. They’re more robust and better suited for initial shaping and heavier scraping tasks. Beveled knives are often preferred for clarinet and saxophone reed adjustments.
The choice between these designs depends on the reed maker’s preference and the specific requirements of the instrument and reed type being worked on.
Preparing the Reed Knife
A well-prepared reed knife is essential for precise and effective reed adjustments. Proper preparation involves careful safety considerations, initial sharpening, and ongoing maintenance to keep the knife in optimal condition.
Safety Considerations
Reed knives are extremely sharp tools that require cautious handling. Always keep fingers away from the blade’s edge when working. Store the knife in a protective sheath when not in use. Wear cut-resistant gloves for added protection during sharpening and maintenance.
Work in a well-lit area with a stable surface to prevent accidents. Never leave the knife unattended, especially around children or pets. When passing the knife to another person, offer the handle first.
Initial Sharpening Process
Reed knife sharpening requires patience and precision. Begin with a fine-grit whetstone, typically 1000-grit or higher. Soak the stone in water for 10-15 minutes before use.
Hold the knife at a consistent 20-degree angle to the stone. Apply light pressure and move the blade in smooth, circular motions. Repeat this process on both sides of the blade.
After sharpening, use a leather strop to remove any remaining burrs. Pull the blade across the strop at the same angle used for sharpening.
Maintenance and Care
Regular maintenance ensures the reed knife remains sharp and effective. After each use, wipe the blade clean with a soft cloth. Apply a thin layer of food-grade mineral oil to prevent rust.
Regrind the knife periodically to maintain its edge. Use progressively finer grits of whetstones, starting with 1000-grit and moving up to 6000-grit or higher.
Store the knife in a dry environment to prevent corrosion. Avoid extreme temperature changes, which can affect the blade’s integrity. Inspect the knife regularly for signs of damage or wear, replacing it if necessary.
Basic Techniques of Using a Reed Knife
A reed knife is an essential tool for reed makers and musicians. Proper technique involves correct grip, angle control, and precise scraping motions to achieve the desired reed shape and thickness.
Holding the Knife Correctly
The proper grip on a reed knife is crucial for control and safety. Hold the knife in your dominant hand, with your thumb and index finger gripping the handle close to the blade. The remaining fingers should wrap around the handle for stability.
Place your thumb on top of the blade near the handle for added control. This grip allows for fine adjustments and precise movements.
Rest the reed on your non-dominant hand’s index finger, supporting it with your other fingers. This provides a stable base for scraping.
Controlling the Angle and Pressure
Maintaining the correct angle and pressure is vital for effective reed shaping. Hold the knife at a 20-30 degree angle to the reed surface.
Apply consistent, light pressure while scraping. Too much pressure can damage the reed or create uneven surfaces.
Adjust the angle slightly for different parts of the reed. A steeper angle may be needed for thicker areas, while a shallower angle works better for delicate sections.
Practice on scrap cane to develop a feel for the right angle and pressure before working on actual reeds.
Scraping Techniques for Reed Making
Reed scraping techniques vary depending on the desired outcome. Always scrape with the grain, moving from the bark towards the tip.
For initial shaping, use longer strokes to remove larger amounts of cane. Start at the bark and work towards the tip, maintaining even pressure.
Use shorter, more controlled strokes for fine-tuning and balancing the reed. Focus on specific areas that need adjustment.
To thin the tip, use very light, short strokes. Be cautious not to remove too much material, as the tip is delicate.
Regularly check your progress by testing the reed’s flexibility and response. Make small adjustments and test frequently to avoid over-scraping.
Advanced Reed Adjustment
Reed adjustment is a meticulous process that requires skill and practice. Proper technique can significantly enhance an instrument’s performance, improving tone, responsiveness, and overall playability.
Balancing the Reed’s Strength
Reed knives are essential tools for balancing reed strength. Start by examining the reed’s spine and heart for unevenness. Carefully scrape small amounts from thicker areas to achieve balance.
Use light, controlled strokes with the knife, working from the reed’s center outward. Check progress frequently by playing the reed.
Test the reed’s resistance by gently pressing it against the mouthpiece. A well-balanced reed should offer uniform resistance across its surface.
Troubleshooting Common Reed Issues
Warped reeds can be flattened by soaking them in water and applying gentle pressure. For reeds that are too hard, carefully thin the tip and sides using fine-grit sandpaper.
Soft reeds may benefit from clipping a small amount off the tip. This can increase resistance and improve tone.
Address squeaking issues by smoothing the reed’s surface with 600-grit wet-dry sandpaper. Focus on the area that contacts the mouthpiece table.
Refining the Reed’s Tone and Responsiveness
To enhance tone, focus on the reed’s tip. Gently scrape a thin layer from the tip’s corners to improve high register response.
Improve low register performance by slightly thinning the reed’s sides. Use caution to maintain the reed’s overall balance.
Support the vamp with a finger or small piece of glass while making adjustments. This ensures precise control and prevents accidental damage.
Test the reed frequently during adjustment. Play various notes and articulations to assess improvements in tone and responsiveness.
Cleaning and Storage of Reed Knives
Proper maintenance of reed knives is crucial for their longevity and effectiveness. Regular cleaning prevents corrosion and buildup, while appropriate storage protects the blade and ensures safety.
Proper Cleaning Methods
After each use, wipe the reed knife blade with a soft, dry cloth to remove moisture and reed particles. For more thorough cleaning, use a mild soap solution and warm water. Gently scrub the blade with a soft brush, taking care not to damage the edge.
Rinse the knife thoroughly and dry it immediately with a clean cloth. Isopropyl alcohol can be used to sanitize the blade and remove any remaining residue.
For knives showing signs of rust or patina, use a specialized metal cleaner or fine steel wool to gently remove surface corrosion. Apply a thin layer of mineral oil to protect the blade from future oxidation.
Storage Best Practices
Store reed knives in a dry environment to prevent moisture-induced corrosion. A dedicated knife roll or case provides individual slots for each knife, protecting the blades from damage and keeping them organized.
If using a knife block, ensure it’s made of a material that won’t dull the blade, such as wood or plastic. Avoid storing knives loosely in drawers, as this can lead to nicks and dulling.
Consider using blade guards or sheaths for additional protection, especially when transporting knives. Keep reed knives out of reach of children and store them separately from other tools to maintain their sharpness.
Regularly inspect stored knives for signs of rust or damage. Proper storage extends the life of the knife and maintains its cutting performance for reed-making tasks.