
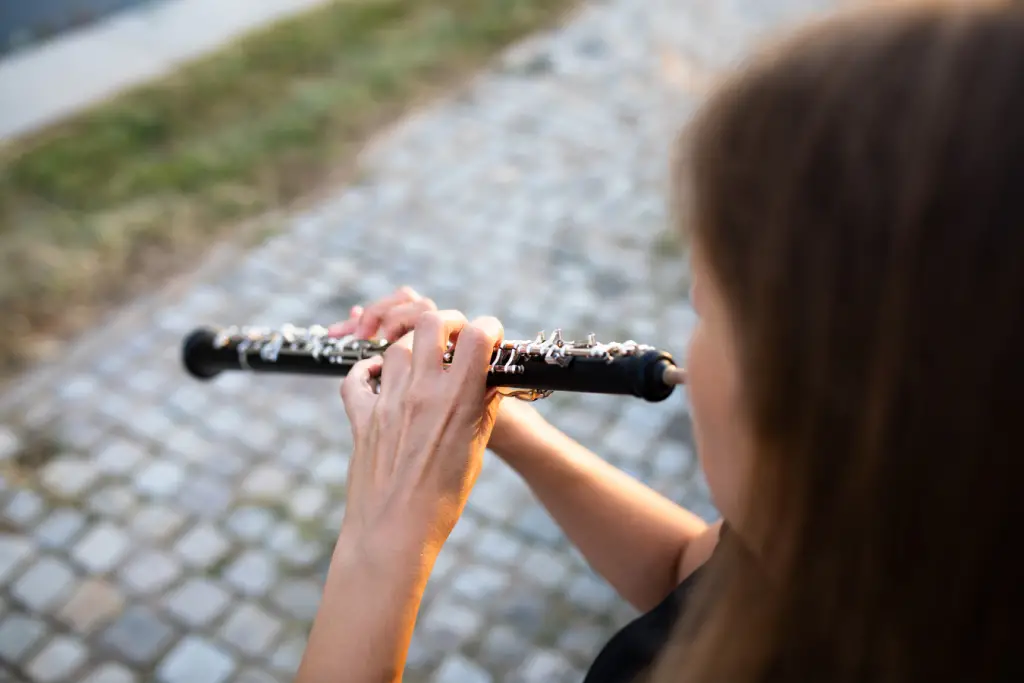
Holding an oboe correctly is crucial for producing beautiful music and maintaining proper posture. Many beginners struggle with finding the right grip and position, which can impact their playing and comfort. To hold the oboe correctly, players should position it at a 45-degree angle away from their body, with the keys facing outward.
Proper hand placement is equally important. The left hand should be positioned near the top of the instrument, while the right hand supports the lower half. This balanced grip allows for smooth fingering and helps prevent fatigue during extended playing sessions.
Mastering the correct oboe hold takes practice and patience. Musicians may find it helpful to check their positioning in a mirror or seek guidance from an experienced instructor. With time, the proper hold will become second nature, allowing players to focus on creating beautiful melodies.
Fundamentals of Oboe Posture
Proper oboe posture is essential for producing a good sound and preventing physical strain. The way a player sits or stands and aligns their body significantly impacts their performance and comfort while playing.
Sitting vs. Standing
Playing the oboe can be done both sitting and standing. When sitting, the player should position themselves at the edge of the chair with feet flat on the floor. This allows for better breath support and control.
Standing provides more freedom of movement and can improve air flow. Players should distribute their weight evenly between both feet, keeping knees slightly bent to avoid locking.
In both positions, the oboist should maintain a straight back without tension. The instrument should be held at approximately a 45-degree angle from the body.
Aligning the Body
Proper body alignment is crucial for comfortable and efficient oboe playing. The head should be balanced on top of the spine, with the chin slightly tucked.
Shoulders should be relaxed and down, away from the ears. Arms should hang naturally from the shoulders, with elbows slightly away from the body.
The right thumb supports the instrument under the thumb rest on the lower joint. Other fingers should be curved naturally over the keys, avoiding tension or stretching.
Proper alignment allows for better breath control and reduces the risk of repetitive strain injuries. Regular practice of correct posture helps it become second nature.
Handling the Oboe
Proper handling of the oboe is crucial for comfortable playing and optimal sound production. Correct positioning and balance allow for effortless finger movement and breath control.
Balancing the Instrument
The oboe should be held at a 45-degree angle from the body. The player supports the instrument’s weight primarily with the right thumb, which rests on the thumb rest. The left hand provides additional support near the top of the instrument.
To maintain balance, the oboist keeps their arms relaxed and slightly away from the body. This posture allows for free movement of the fingers and reduces tension in the shoulders and neck.
The bell of the oboe should not touch the player’s leg or knee. Keeping the instrument elevated helps project the sound and prevents muffling.
Position of the Hands
The left hand is placed at the top of the oboe, with the thumb resting on the octave key. The fingers curve naturally over the upper joint keys. The right hand is positioned lower on the instrument, with the thumb on the thumb rest.
Fingers should remain curved and relaxed, hovering close to the keys. This position allows for quick and precise movements when playing. The pinkies of both hands should be kept near their respective keys, ready for use.
It’s important to maintain a relaxed grip on the oboe. Excessive tension can lead to discomfort and hinder playing technique. Players should aim for a natural, comfortable hand position similar to holding everyday objects.
Regular practice of proper hand positioning helps develop muscle memory, making it easier to maintain correct form during extended playing sessions.
Finger Placement and Technique
Proper finger placement and technique are crucial for playing the oboe effectively. Mastering these elements ensures comfortable hand positions and smooth transitions between notes.
Right Hand Position
The right hand plays a vital role in oboe playing. Place the right thumb under the thumb rest for support. Position the index, middle, and ring fingers on the lower joint keys. The pinky rests on the side keys.
Maintain a relaxed, curved shape with your fingers. Avoid excessive tension or stretching. Keep your wrist straight and aligned with your forearm.
Proper hand positioning is essential for reaching all keys comfortably. Practice moving between different fingerings smoothly to develop muscle memory.
Left Hand Position
The left hand controls the upper joint of the oboe. Place your left thumb on the octave key at the back of the instrument. Position your index, middle, and ring fingers on the upper joint keys.
Curve your fingers naturally, keeping them close to the keys. Avoid flattening or overextending your fingers. Maintain a relaxed grip on the instrument.
Pay attention to the alignment of your left arm and wrist. Keep them in a straight line to prevent strain during extended playing sessions.
Alternate Fingerings
Alternate fingerings are essential for improving technical facility on the oboe. They offer solutions for tricky passages and help achieve better intonation.
Some common alternate fingerings include:
- F/F# trill key
- Left F key
- Side C key
Experiment with these fingerings to find what works best for specific musical contexts. Practice smooth transitions between standard and alternate fingerings.
Consult fingering charts and method books for comprehensive alternate fingering options. Regular practice with these fingerings will enhance your overall technique and flexibility on the instrument.
Breath Support and Embouchure
Proper breath support and embouchure are crucial for producing a clear, resonant tone on the oboe. These techniques work together to control airflow and shape the reed’s vibration.
Developing a Stable Embouchure
An oboist’s embouchure involves forming the lips around the reed to create the optimal opening for sound production. The lips should be firm but flexible, curling slightly inward to cushion the reed.
Proper embouchure formation is essential for maintaining control over pitch and tone quality. Oboists should aim to keep the corners of their mouth firm while allowing the center of the lips to remain pliable.
To practice, players can start by forming their embouchure without the instrument, then gradually introduce the reed and oboe. Regular mirror practice helps refine embouchure consistency.
Breathing Techniques
Effective breath support is vital for maintaining steady airflow through the oboe. Diaphragmatic breathing forms the foundation of good oboe technique.
To develop proper breath support:
- Practice deep, low breaths that expand the abdomen
- Focus on controlled exhalation to maintain consistent air pressure
- Work on circular breathing techniques for sustained passages
Oboists should aim to match their breath support to the reed’s resistance. This balance allows for better control over dynamics and tone quality across the instrument’s range.
Regular breathing exercises away from the instrument can significantly improve an oboist’s overall breath control and endurance.
Instrument Care While Playing
Proper oboe care during performance is crucial for maintaining the instrument’s quality and longevity. Moisture management and regular cleaning are key practices every oboist should master.
Preventing Moisture Buildup
Moisture is an oboe’s greatest enemy. To combat this, oboists should blow warm air through the instrument before playing to warm it up gradually. This helps prevent condensation from forming inside the bore.
During breaks, remove the reed and place it in a reed case. Don’t leave it attached to the oboe, as saliva can seep into the top joint.
Use absorbent pads under the keys to catch excess moisture. These pads should be replaced regularly to maintain their effectiveness.
For wooden oboes, be cautious of sudden temperature changes. Allow the instrument to adjust to room temperature before playing to prevent cracks in the wood.
Regular Swabbing
Swabbing the oboe after every playing session is essential. Use a clean, lint-free swab to remove moisture from the bore.
Start with the top joint, then the bottom joint, and finally the bell. Ensure the swab passes through completely without getting stuck.
Pay special attention to the tone holes and key work. Use a small, soft brush to remove any debris or moisture around these areas.
For synthetic oboes, swabbing is still important to prevent bacterial growth and maintain optimal playing conditions.
Common Challenges in Holding the Oboe
Many oboists face difficulties when learning to hold their instrument properly. Hand pain is a frequent issue, especially for beginners who may grip the oboe too tightly. Improper hand position can lead to discomfort and hinder performance.
Maintaining the correct 45-degree angle can be tricky for new players. The oboe should be tilted away from the body, neither pointing straight down nor straight out. Achieving this balance takes practice and awareness.
Finger placement presents another challenge. The right thumb must support the instrument under the thumb rest, while the left hand’s first finger rests on the half-hole key. Proper thumb positioning on both hands is crucial for stability and ease of playing.
Balancing the oboe’s weight can be difficult, especially for younger players with smaller hands. The instrument should feel comfortable and not strain the wrists or fingers.
Consistent posture is essential but often overlooked. Players must maintain an upright stance while holding the oboe, which can be tiring during long practice sessions or performances.
Coordinating breath control with proper holding technique poses a challenge for many oboists. The embouchure and breathing must work in harmony with the hands’ position to produce clear, resonant tones.
Ergonomic Aids and Modifications
Proper ergonomic support and instrument modifications can significantly enhance comfort and prevent strain while playing the oboe. These adjustments are crucial for maintaining good posture and reducing the risk of repetitive stress injuries.
Neck Straps and Thumb Rests
Neck straps provide essential support by redistributing the oboe’s weight from the hands to the neck and shoulders. This reduces strain on the right thumb, which typically bears most of the instrument’s weight. Quality neck straps are adjustable and padded for comfort.
Thumb rests come in various shapes and sizes. Some are curved to fit the natural contour of the thumb, while others are flat. Adjustable thumb rests allow players to find the optimal position for their hand size and playing style.
Many oboists use both a neck strap and thumb rest in combination. This dual support system offers maximum comfort and stability, especially during long practice sessions or performances.
Adjustments for Small Hands
Players with smaller hands may struggle with standard oboe key configurations. Fortunately, several modifications can help:
- Key risers: These small attachments elevate certain keys, bringing them closer to the fingers.
- Bridge mechanisms: Custom linkages can connect distant keys, making them easier to reach.
- Alternate fingerings: Learning alternative ways to play certain notes can reduce stretching.
Some oboe manufacturers offer models specifically designed for smaller hands. These instruments may have slightly reduced key spacing or modified key placements to accommodate shorter fingers.
It’s important to work with a qualified oboe technician when making any modifications. They can ensure that adjustments don’t negatively impact the instrument’s sound or mechanics.
Transitioning to Performance
Transitioning from practice to performance requires additional considerations for oboe players. Proper posture becomes even more crucial when on stage.
Players should stand or sit with a straight back, keeping the shoulders relaxed. The oboe should be held at a 45-degree angle from the body, allowing for optimal air flow and finger movement.
Breath control is essential for sustained performance. Oboists must practice deep, diaphragmatic breathing to support long phrases and maintain tone quality throughout a piece.
Stage presence also plays a role in performance. Musicians should project confidence through their body language, maintaining eye contact with the conductor or audience as appropriate.
Pre-performance routine:
- Warm up fingers and embouchure
- Check reed condition
- Tune with ensemble
- Review challenging passages
Proper hand position remains critical during performance. The left hand should grip the upper joint, with fingers curved naturally over the keys. The right hand supports the lower joint, maintaining a relaxed grip.
Performance anxiety can affect hand stability. Regular practice in front of others can help alleviate nerves and improve muscle memory for correct hand placement.
Oboists should be mindful of their octave key technique during performances. Smooth transitions between registers require precise finger movements, especially when using the half-hole.
With consistent practice and attention to proper technique, oboists can confidently transition their skills from the practice room to the performance stage.