
Making your own oboe reeds can be a rewarding and cost-effective endeavor for dedicated oboists. While it requires skill, practice, and specialized tools, many players find the process fulfilling and essential for developing their musical craft.
With patience and dedication, oboists can learn to craft their own reeds, tailoring them to their specific playing needs and preferences. The process involves shaping cane, tying it onto a staple, and carefully scraping the reed to achieve the desired tone and response. Beginners may start by adjusting pre-made reeds before advancing to making reeds from scratch.
Learning to make oboe reeds offers several advantages. It allows players to customize their sound, save money in the long run, and have a reliable supply of reeds tailored to their instrument and playing style. While the initial investment in tools and materials can be significant, many oboists find that making their own reeds becomes an integral part of their musical journey.
Understanding the Oboe Reed
Oboe reeds are intricate components crucial to producing sound on the instrument. They consist of carefully shaped cane that vibrates to create the oboe’s distinctive tone. The reed’s design affects its strength, response, and overall playability.
Components of an Oboe Reed
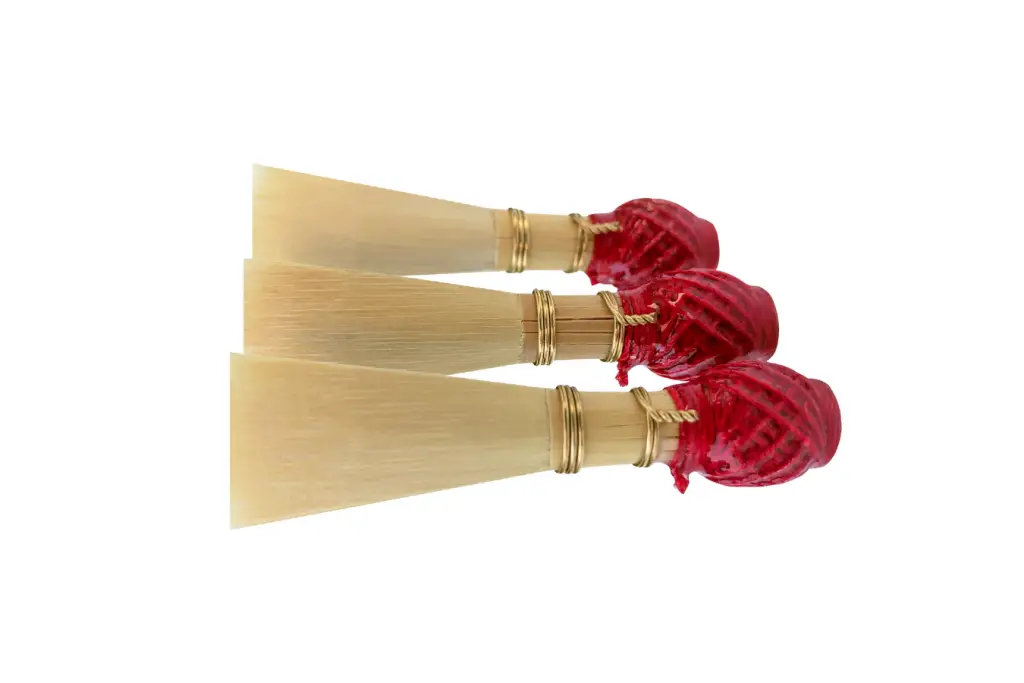
An oboe reed is made from a piece of cane, typically Arundo donax. The reed has several key parts:
- Tip: The thin, vibrating end that goes into the player’s mouth
- Heart: The thicker section below the tip
- Spine: The center ridge running down the reed
- Back: The lower portion that fits onto the oboe’s staple
Cane selection is crucial, with diameters ranging from 10.0mm to 11.0mm commonly used by American reed makers. The cane is shaped, gouged, and folded to create the reed’s distinctive form.
Reed Strength and Response
Reed strength affects how easily it vibrates and produces sound. Factors influencing strength include:
- Cane thickness
- Shape of the scrape
- Length of the reed
Stronger reeds require more air pressure but can produce a fuller tone. Softer reeds are easier to play but may lack tonal depth.
Customizing reed characteristics allows oboists to tailor the instrument’s response to their playing style and physical capabilities.
Impact on Sound and Playability
The reed significantly influences the oboe’s sound and playability. Key aspects include:
- Tone color: Affected by the reed’s scrape and overall design
- Intonation: Proper reed construction ensures accurate pitch
- Dynamic range: A well-made reed allows for expressive playing from soft to loud
Fine-tuning reed elements such as thickness, length, and shape enables oboists to achieve their desired sound quality. This level of customization is a primary reason many oboists choose to make their own reeds.
Tools and Materials Required
Making oboe reeds requires specialized equipment and high-quality materials. The essential items include precision tools, carefully selected cane, and various supplies to shape and finish the reeds.
Reed Making Tools
Oboe reed makers need several specific tools. A sharp knife is crucial for cutting and shaping the cane. Many oboists prefer double-hollow ground knives for their precision. A cutting block, typically made of wood or glass, provides a stable surface for knife work.
Plaque and mandrel are indispensable for shaping the reed. The plaque, a thin metal piece, protects one side of the reed while working on the other. A mandrel holds the reed securely during the tying process.
Specialized scissors are needed for trimming the cane. Reed makers also use calipers to measure cane thickness and a micrometer to ensure consistent measurements.
Selection of Cane
Choosing the right cane is critical for making quality oboe reeds. Oboe cane comes in various stages, from tube cane to gouged, shaped, and folded pieces. Most American reed makers prefer cane with a diameter between 10.0mm and 11.0mm.
The cane’s quality affects the reed’s sound and responsiveness. Factors to consider include:
- Density
- Fiber structure
- Color
- Age
Experienced reed makers often test cane for flexibility and resonance before use. Purchasing pre-gouged cane can save time but may limit customization options.
Other Necessary Supplies
Reed making requires additional supplies beyond tools and cane. Thread is essential for tying the reed, with most oboists using nylon or silk thread. Cork or staples are needed to create a base for attaching the reed to the oboe.
Beeswax or paraffin is used to seal the thread and prevent unraveling. Sandpaper or diamond files help in final adjustments and smoothing.
A ruler or gauge aids in achieving proper reed proportions. Many reed makers also use a sharpening stone to maintain their knives’ edge. Protective eyewear is recommended for safety during the reed-making process.
Preparation of the Cane
Preparing oboe reed cane involves several crucial steps. Each stage requires precision and care to ensure the reed’s quality and playability.
Splitting and Shaping
Oboe cane typically comes in tube form and must be split and shaped. Reed makers use a sharp knife to split the cane into smaller pieces. These pieces are then shaped using specialized tools.
The cane is carefully gouged to achieve the desired thickness. This process requires skill and precision to maintain consistency. After gouging, the cane is shaped using a shaper tip.
The shaper tip determines the final width and taper of the reed. Different shapes can affect the reed’s tone and response. Experienced reed makers often have preferred shapes that suit their playing style.
Soaking the Cane
Soaking the cane is a critical step in reed preparation. It softens the fibers, making the cane more pliable and easier to work with.
Proper soaking ensures the reed performs well. The cane is typically soaked in clean water for 5-10 minutes. Some reed makers prefer to use special solutions or add a drop of hydrogen peroxide to the water.
Soaking affects the hardness of the cane and the size of the opening. Over-soaking can lead to waterlogged cane, while under-soaking may result in brittle reeds.
Tying the Reed
Once the cane is prepared, it’s time to tie the reed. This process involves folding the shaped cane and securing it to a metal staple or tube.
Reed makers use strong thread to tie the cane tightly. The tying process requires careful attention to ensure proper alignment and tension.
The length of the tied section and the placement of the first wire can affect the reed’s response. Many reed makers use a mandrel to maintain the correct shape during tying.
After tying, the reed is left to dry before further adjustments are made. This drying period allows the cane to set in its new shape.
Reed Scraping Techniques
Mastering reed scraping is essential for creating high-quality oboe reeds. Proper techniques involve carefully removing layers of cane to achieve the desired thickness, flexibility, and sound. Attention to detail and precision are key throughout the process.
Basic Scraping Steps
Reed scraping begins with sharpening the reed knife. A sharp knife ensures clean cuts and prevents tearing the cane. Start by scraping the back of the reed, working from the string towards the tip. Remove small amounts of cane evenly across the surface.
Next, focus on the tip area. Scrape gently to thin the tip, aiming for a thickness of about 0.1-0.2 mm. Be careful not to over-scrape, as this can weaken the reed.
Work on the heart of the reed, located just below the tip. This area should be slightly thicker than the tip but thinner than the back. Maintain a gradual taper from the thick back to the thin tip.
Fine Tuning the Reed
After establishing the basic shape, fine-tuning involves making subtle adjustments. Focus on balancing the reed’s two sides. Ensure they are symmetrical in thickness and shape.
Scrape the sides of the reed to improve response and articulation. Be cautious not to remove too much cane from the rails, as this can affect stability.
Pay attention to the spine, the centerline of the reed. A slightly thicker spine can provide stability and improve tone quality. Use light, controlled scrapes to refine this area.
Smooth out the top of the tip for better tone quality and control. This step helps eliminate unwanted buzzing or harshness in the sound.
Testing the Reed
Regularly test the reed throughout the scraping process. Play long tones to assess stability and intonation. Check articulation by playing short, staccato notes.
Test the reed’s crow by holding it between your lips and blowing. A well-made reed should produce a clear, steady crow at the desired pitch (usually C or C#).
Evaluate the reed’s resistance. It should offer some resistance but not feel too hard to play. Adjust by scraping more if it’s too resistant or leaving it thicker if it’s too easy to blow.
Check the reed’s response across all registers. Make small adjustments to improve performance in weak areas. Remember that small changes can significantly impact the reed’s quality.
Reed Adjustment and Maintenance
Proper adjustment and maintenance are crucial for optimal oboe reed performance. Regular care and minor tweaks can significantly improve sound quality and playing experience.
Balancing and Adjustment
Reed adjustment begins with assessing the opening. If it’s too large, soak the reed well and gently squeeze behind the tip with a plaque inserted. For reeds with wires, squeezing the wire can open or close the reed as needed.
Balancing involves scraping specific areas to adjust tone and response. The tip affects articulation, while the back influences pitch and stability. Use a sharp knife and work in small increments.
Test the crow frequently during adjustments. A well-balanced reed should produce three octaves of C when blown with the mouth on the thread.
Maintaining Reeds over Time
Proper storage is essential for reed longevity. Use a reed case rather than airtight vials to prevent mold growth. After playing, gently blow excess moisture from the cane without adding saliva.
Rotate between multiple reeds to extend their lifespan. This allows each reed time to dry and recover between uses.
Periodically inspect reeds for signs of wear or damage. Small cracks or splits may be salvageable with careful scraping and adjustment.
Troubleshooting Common Problems
If a reed feels thin or closes up during playing, it may be too open. Gently squeeze the wire or behind the tip to close it slightly.
For stuffy or resistant reeds, carefully scrape the back to increase flexibility. Be cautious not to remove too much cane, as this can affect pitch and stability.
If the reed produces a harsh or buzzy sound, the opening may be too large. Soak and gently close the tip, then reassess the crow and playability.
Inconsistent response across registers often indicates an imbalance. Adjust by scraping problem areas in small increments, testing frequently.
Advanced Reed Making Concepts
Mastering advanced reed making techniques allows oboists to fine-tune their sound and playing experience. These skills focus on precise adjustments to stabilize pitch and customize reeds for individual playing styles.
Stabilizing Pitch and Intonation
Achieving stable pitch and intonation requires careful attention to the reed’s dimensions and shape. Scraping techniques play a crucial role in this process. Oboists should focus on:
- Balancing the tip and heart of the reed
- Adjusting the thickness of the spine
- Fine-tuning the corners
A well-balanced reed will respond consistently across all registers. Experienced reed makers often use specialized tools like dial indicators to measure reed thickness with precision.
Experimenting with different cane thicknesses can also impact stability. Cane diameter typically ranges from 10.0mm to 11.0mm, with smaller diameters potentially offering more stability in higher registers.
Optimizing for Personal Playing Style
Tailoring reeds to suit individual playing styles involves considering factors such as embouchure strength and air support. Key aspects include:
- Adjusting reed opening
- Modifying the overall length
- Experimenting with different cane hardnesses
Players with a strong embouchure may prefer stiffer reeds, while those with softer embouchures might opt for more flexible options. The goal is to find a balance that allows for expressive playing while maintaining control.
Reed making can take thousands of hours to master, but the ability to create personalized reeds is invaluable. Keeping detailed notes on successful adjustments helps refine the process over time.
Consistency and Quality Control
Maintaining uniformity across reed batches and implementing strategies for ongoing improvement are crucial for oboe players who make their own reeds. These practices ensure reliable performance and gradual enhancement of reed-making skills over time.
Creating Batch Uniformity
To achieve consistency when making oboe reeds, players should standardize their materials and processes. Using cane from the same source and maintaining consistent gouging and shaping techniques are essential.
Precise measurements are key. Players should utilize calipers to ensure uniform thickness and length across reeds. A reed gauge can help maintain consistent tip openings.
Keeping detailed records of each batch, including cane source, measurements, and playing characteristics, allows for replication of successful reeds. This data also aids in identifying and correcting issues in future batches.
Environmental factors like humidity and temperature can affect reed consistency. Using a humidifier in the reed-making area helps maintain stable conditions.
Long-term Improvement Strategies
Continuous learning is vital for refining reed-making skills. Oboe players should seek guidance from experienced reed makers and attend workshops to learn new techniques and stay updated on best practices.
Regular self-assessment is crucial. Players should critically evaluate their reeds’ performance and make incremental adjustments to improve tone, response, and intonation. Keeping a log of these changes and their effects aids in tracking progress over time.
Experimenting with different cane types, gouging thicknesses, and shaping styles can lead to discoveries that enhance reed quality. However, changes should be introduced systematically to isolate their effects.
Investing in high-quality tools and maintaining them properly ensures consistent results. Sharp knives, well-calibrated gouging machines, and precise shaping tools contribute to reed uniformity and overall quality.